TABLE OF CONTENTS
Cash Receipts
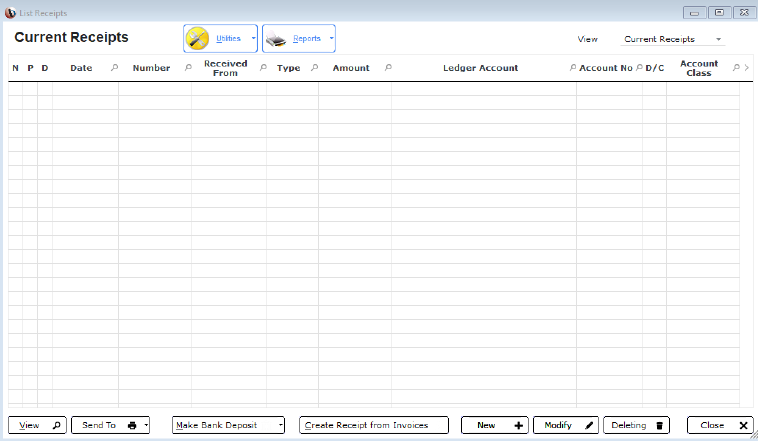
A cash receipt is issued upon receipt of funds whether via cash, cheque or direct deposit.
Funds may be in the form of a payment from a debtor for an invoice, interest received, a refund or rebate.
Funds can be directly allocated to a bank account.
Receipts can be printed or emailed direct. Notes can be added as required.
Selecting Bank Accounts
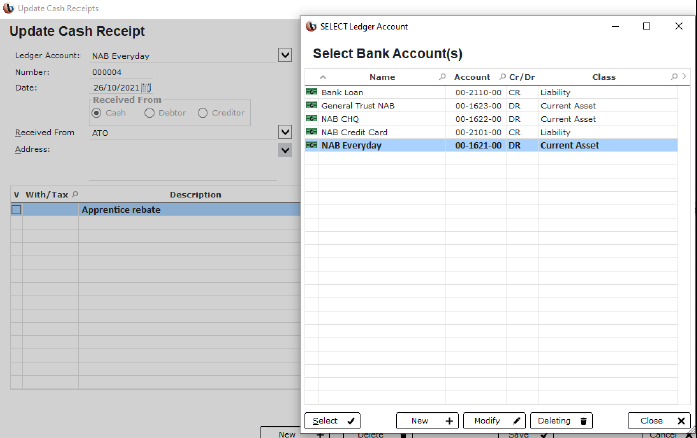
From the drop down you can select the bank account you wish to allocate funds to.
A default account can be set under the program settings; however an alternate account can be selected at this screen.
If this option is used there is no need to use the deposit funds option.
Receipting Debtor's Payment

Allocating Funds
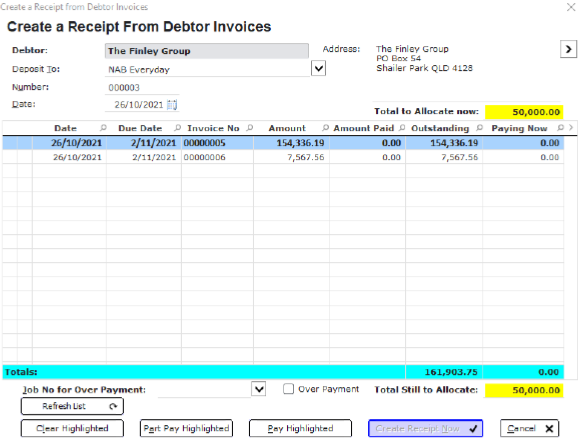
If there is more than one invoice outstanding, the funds can be spread over several invoices or allocated to a single invoice.
If you wish to spread the payment over several invoices click on pay highlighted.
Allocating the full amount can be done by clicking on pay highlighted.
Part Pay Highlighted
Highlight the invoice you wish to part pay; select part-pay highlighted.
You will be prompted to nominate the amount you wish to allocate.
Once the figure has been entered click validate and then close.
The remainder of the amount to be allocated will display on screen.

Pay Highlighted
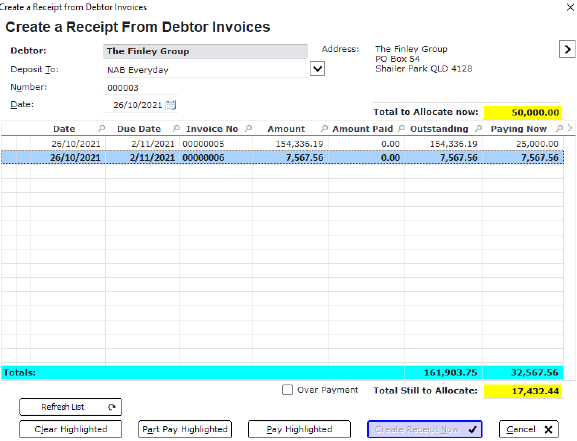
Click on pay highlighted and the funds will be allocated to the highlighted invoice.
Any funds remaining can be allocated to another invoice.
Alternately they can be allocated as an overpayment.
Allocate Overpayment
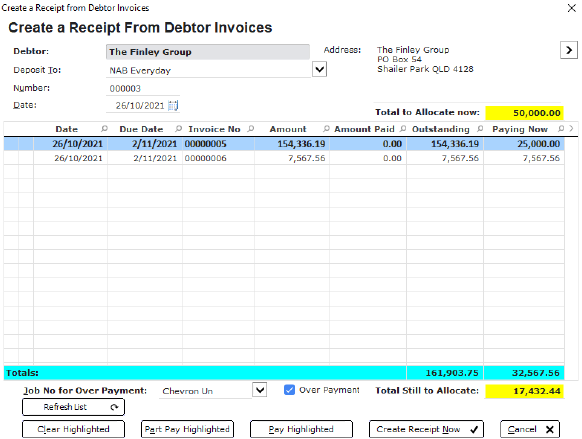
Tick the over payment box, from the drop down box select the job you wish to allocate the over payment to.
Once the details are complete click create receipt now. This will create the receipt for the full amount, distributing the funds are needed; while allowing for the over payment to be allocated at a later time. *
*Refer to over payment allocation guide
New Receipt
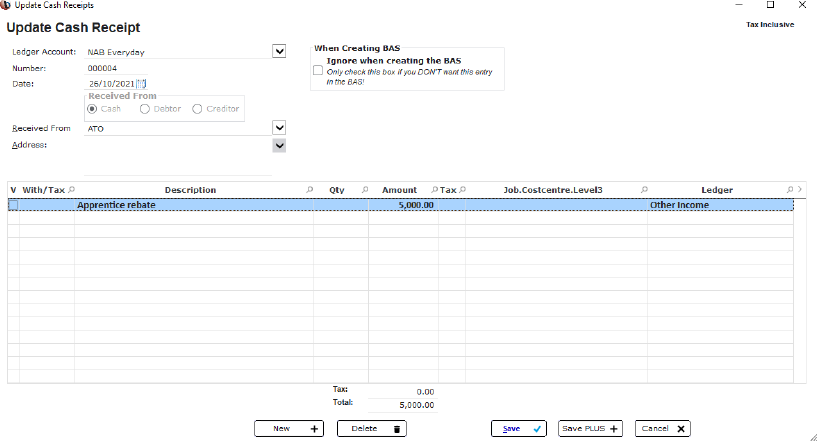
Funds received from another source will need to be receipted.
Start by clicking new.
Add details for who we have received money from. Include a description as well as the amount.
Funds will need to be allocated to an income account.
Once all details have been added click save.
Automatic Allocation
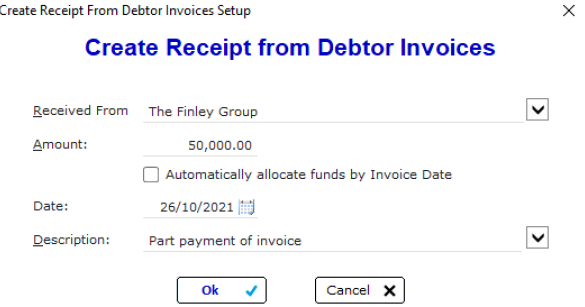
When creating receipts from debtors you have the option of automatically allocating funds.
The funds being receipted will automatically allocated to the invoices by date order.
Invoices will either be fully paid or part paid as the fund allocation allows.

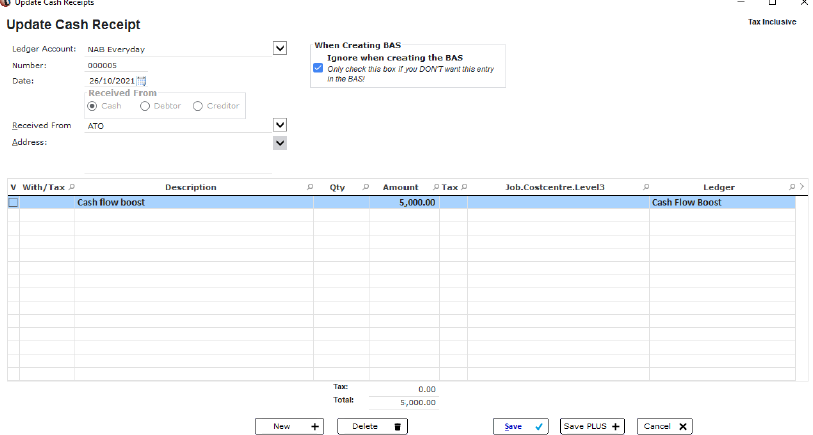
Ignore When Creating BAS
Some payments that are received may not need to be included in the calculation for the BAS.
If this is the case tick “ignore when creating BAS” and the entry will not be included in the calculation.
Utilities/ View Menu
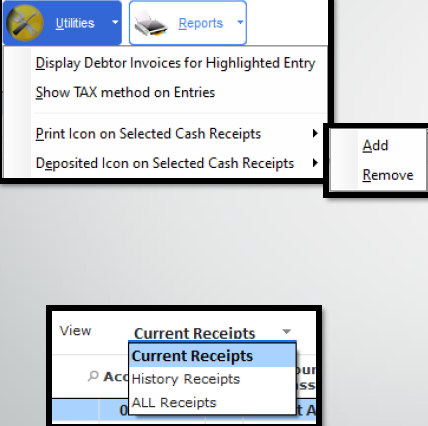
The utilities menu offers a number of useful options.
When highlighting a payment received from a debtor; by selecting display debtor invoices for highlighted entry; the invoices that have been paid by the amount will be displayed.
The tax method will show if the entry is either cash or accrual.
Print & deposit icons can be added or removed as required.
The view option allows you to view either current or history receipts.
Options
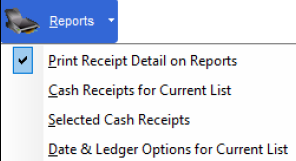
Reports
There are a number of report options available; by selecting Print receipt detail, all available details will be included on the report selected.
View
Allows you to view the contents of the entry

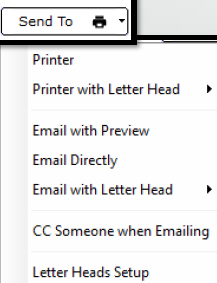
Send to:
Shows the options available to send a receipt
Depositing Funds
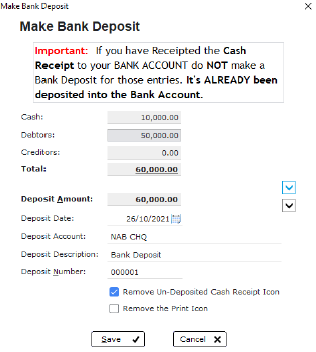
If you choose to receipt funds to a generic cash on hand account, you will need to deposit the funds to a bank account for reconciliation purposes.
You can choose to deposit un-deposited receipts; this will collate all of the undeposited funds and deposit them together. Choosing the selected receipts option will deposit only the highlighted receipt.
It should be noted that if you receipt to a bank account direct, you will NOT need to complete this step.

Cash Payments
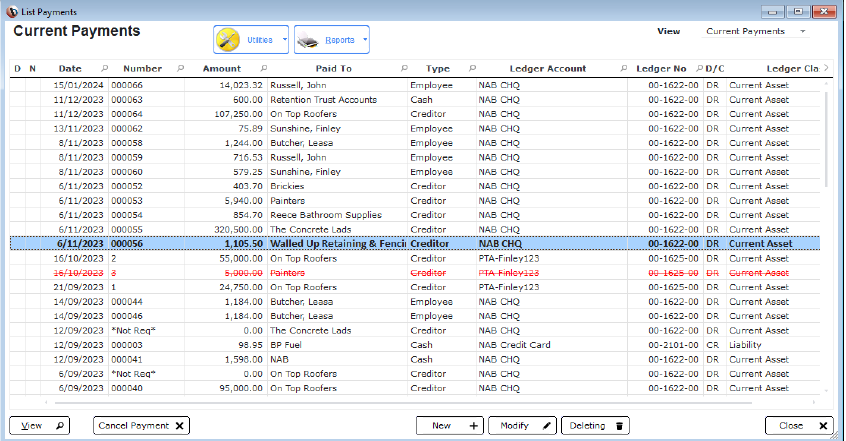
Payments for invoices and payroll are automatically posted to the cash payments listing. The list will show if the payment is to a creditor, employee or to cash.
A cash payment is made to record payments made to entities that we do not have an account with.
New payments can be added at this screen.
New Payment
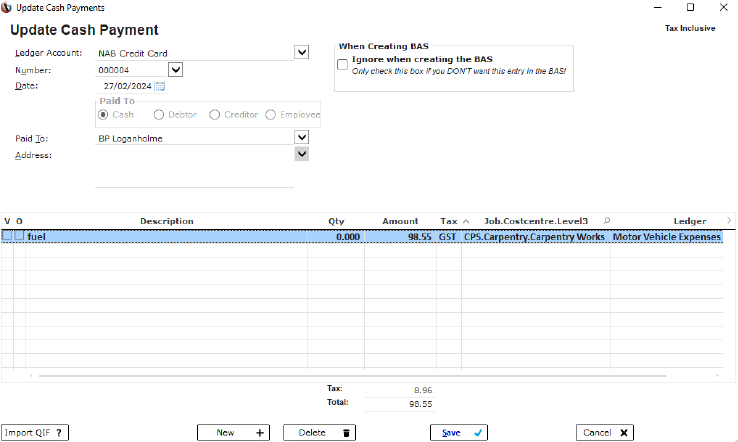
Begin adding the details of the new payment.
From the drop-down list select the account or credit card used for the payment.
Add the details of the payment including a description, the amount, GST code if applicable and finally the ledger account.

Allocate Job Cost
Expenses can be allocated to a job if required.
Select the job, cost centre and 3rdlevel job cost (if using Premium or Ultimate versions)
Save Plus
The “Save Plus+” option allows you to add multiple entries for the selected ledger account. From the drop-down box select the required ledger account; add all the transaction details.
To add another transaction, click the “save plus +” button. This will close the previous transaction and open the next ready to add transaction details.
Complete this action for as many transactions as is required.

Excluding Transactions
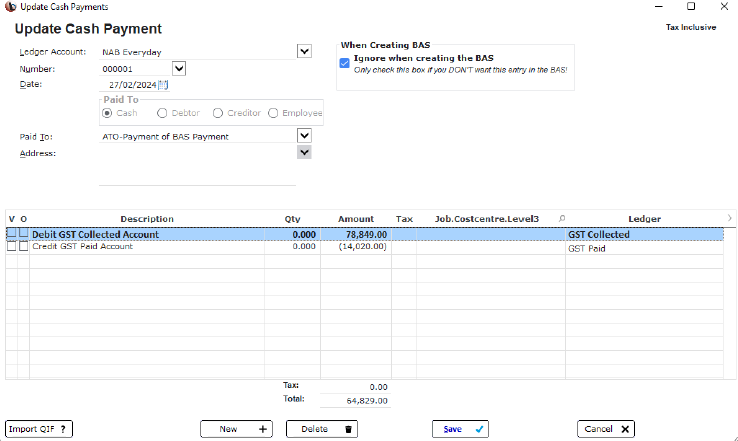
Transactions such as payments made to the ATO are not ordinarily included in the BAS calculation.
Ticking this box in the cash payment window will exclude the transaction from the BAS calculation.
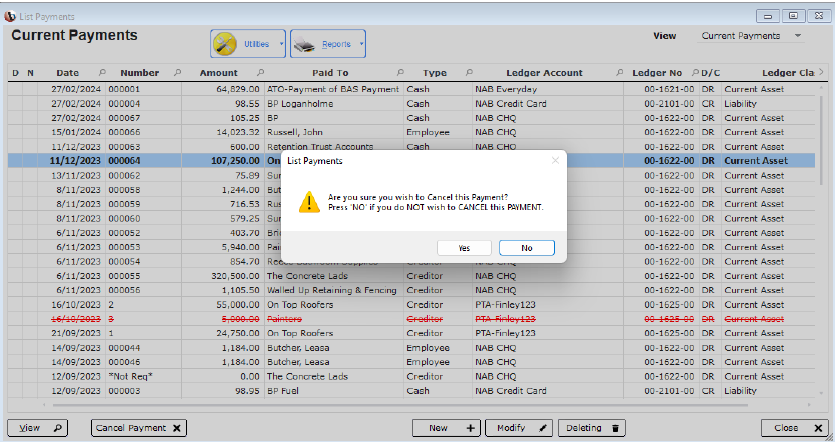
Cancelling Payment
Cancelling a payment was originally used when cheques were issued, and the cheque was lost.
Using this method will cancel the transaction, return the invoice (if attached) to current for adjustment.
The transaction will still appear in the listing in red to indicate that the transaction has been cancelled.
Utilities
The utilities menu offers several options or functions helpful to the cash payments window.
The creditor invoices for payment, will display the invoices that have been paid with the listed payment amount.
Recurring transactions can be managed from this box.
Show tax method on entries will show the accounting method being used.

Reports
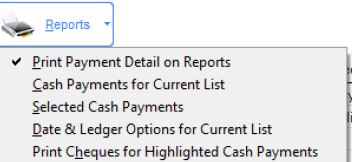
The reports option provides a variety of reports for the cash payments.
By selecting Print payment detail on report; all details of the payment will be included.
For reports where there are date parameters; you will need to set the required parameters before printing the report.
Deleting a Cash Payment
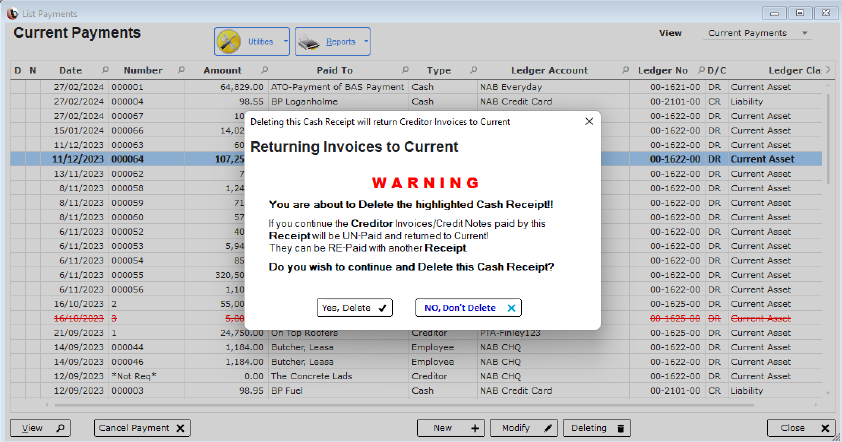
If necessary, a cash payment can be deleted.
Deleting a cash payment will return all invoices attached to the payment to current. Any adjustments can be made, and the invoices reprocessed.
Note: Payments made from a Trust account cannot be deleted, they can be cancelled if needed.
Reconciliation Warning
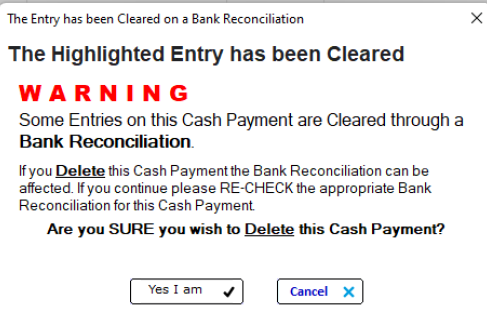
If a transaction has been cleared through the bank reconciliation process you will receive a warning.
The transaction can be deleted but you must go back to the reconciliation and re-check that statement.
Ledger Warnings
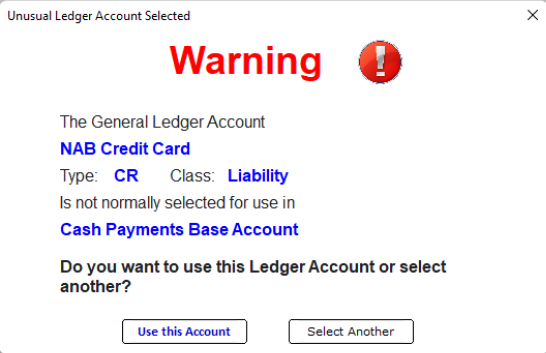
When selecting a ledger that is not usually used for cash payments you will receive a warning.
The ledger account can be used or re-selected if it is incorrect.
If you wish to proceed with the selected ledger click on use this account.
Bank Transfers
Direct Transfer Files
ABA files are used for bulk electronic payments. Bizprac is able to create the ABA file for use with your internet banking software.
The files are created and the user uploads the ABA file via their banking software. This allows you to make bulk payments, saving time and manual entry- reducing errors in processing.
For the creation of ABA files you will need to setup the following areas:
➢The location on your system or network the ABA file will be saved to
➢Bank Account/ Processing details for your business in the General Ledger
➢Bank account details for each creditor, subcontractor and employee
➢The necessary banking software from your banking institution
Adding Bank Details
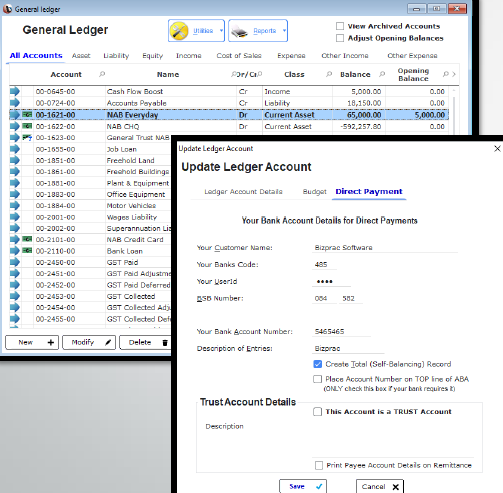
Locate the bank account ledger and click modify and then the Direct Payment tab.
Fill in each line of the tab; your banking institution will provide the necessary details.
Some banks require a self balancing record, tick this option if applicable.
Setting the Bank Folder
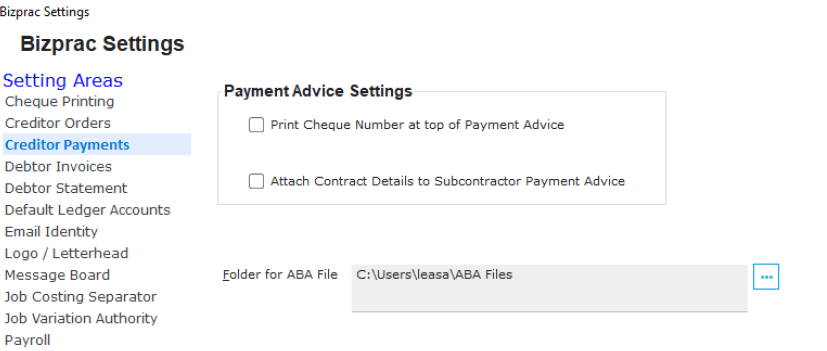
Under the settings menu a default location can be set for the ABA files. In the program setup, under creditor payments make your selection.
Using the radio button you can browse to the required location.
Creditor Bank Detail
Bank details for creditors are added under the bank payments tab.
This is accessed by modifying the required creditor.

Pay by ABA File
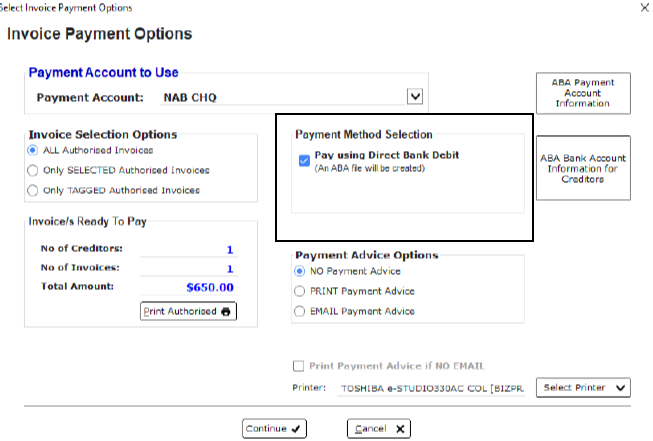
Once the authorised invoices are selected for payment; at the Invoice payments option window select “Pay using Direct Bank Debit”
This will allow for the creation of an ABA file.
Make the payments as authorised and the ABA file will be created in the selected folder. Use your banking software to upload the file to complete payment.
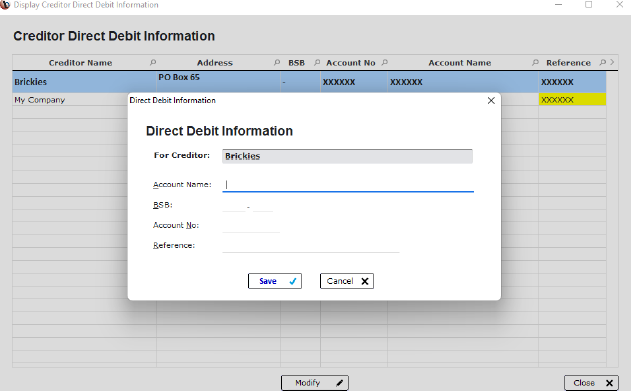
Missing Information
When processing payments & ABA file is selected, if any creditor information is missing there will be a warning displayed.
The required details can be added by clicking on ABA Bank Account Information for creditors.

Adding Details
Highlight the creditor with the missing information & click modify. You will be able to add the required details before continuing with the pay run.
Payment Process
Payments made by ABA files will be shown as D-process number-numbering as per the list.

Where Do I Find My File?
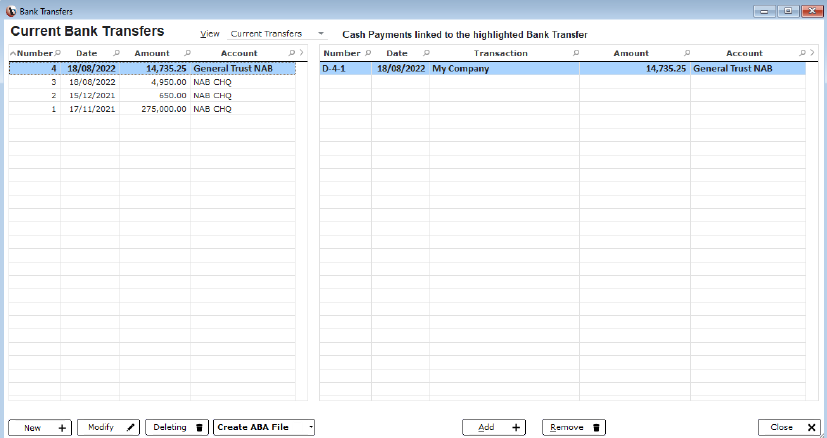
A list of the ABA files can be found under the transfers window.
This will list the ABA files as well as the payments that are included in the file.
The account that was used to create the file will also be shown.
